
This post may include affiliate links; see our disclosure policy.
Don’t miss out on the very best fall dinner ideas featuring seasonal produce! Try healthy dinner recipes from cozy pot pie to chili.

Once fall starts, it’s all we can do to hold back on our fall food traditions. There’s the first chili of the season. Then pumpkin cookies and pumpkin bread. And of course, all the squash: risotto, soup, stuffed squash, you name it! Here we’ve compiled a list of all the best cozy fall dinner ideas that embody the coziness and produce of the season. You won’t want to let the season go by without making every single one of these tasty and healthy fall dinner recipes.
And now, our top fall dinner ideas and recipes!

Welcome to your new favorite fall dinner idea: Butternut Squash Lasagna with Sage! The flavors are impeccable: creamy ricotta, punchy Pecorino, and fresh sage envelop the sweet squash in a cozy embrace. In fact, an embrace is just what it feels like when you take a bite!

Here’s a chili recipe that’s jumped to the top of our favorites list: Pumpkin Chili! Perhaps you already knew this secret, but adding pumpkin puree to chili adds an intensely creamy, flavorful body to this classic dish. This one is hearty and healthy, packed with spices, sweet potato and beans. Load it up with all your favorite chili toppings, and it’s a satisfying fall dinner recipe that’s ideal for weeknights or dinner parties.

Need a fall dinner idea? Look no further than this trusty trick: Stuffed Sweet Potatoes! Bake the spuds whole until they’re moist and tender, then top with savory fillings to make a hearty dinner recipe. The way the savory black beans contrast with the sweet orange flesh makes magic, in our opinion.

Another must-make in our fall dinner recipes: pot pie! This vegan pot pie is a stunner. Earthy carrots, potatoes and onions are slathered in a savory, creamy gravy, along with fried shallots and white beans. And on top, a flaky pastry crust that you won't be able to stop sneaking.
Eat vegan? Try our Vegan Pot Pie with Sage Crust.

What's a fall without wild rice soup? This healthy fall recipe has perfectly tender while rice, surrounded by aromatic veggies in the creamiest sauce possible. It's impossibly creamy yet 100% plant based! This one always gets rave reviews: last time we served it, it was deemed "the best wild rice soup ever"
Try either: Best Wild Rice Soup or Instant Pot Wild Rice Soup.
Take it over the top: Serve with Beet Salad & Fall Sangria!

Here's a classic fall dinner idea: and the smell alone of this butternut squash risotto bubbling away is reason to make it! The tender, caramelized roasted squash makes sweet pockets in the creamy Parmesan rice dotted with sage. And that smell of shallots sauteing in butter, with a splash of white wine? DIVINE.

Here’s an incredible fall dinner recipe that’s impressive every time: these Sweet Potato and Black Bean Enchiladas! It’s stood the test of time and has been a fan favorite for years. Tender sweet potatoes are the perfect contrast to savory black beans and tangy salsa verde. Top it off with Colby cheese, it’s the best gooey comfort food around. This one will please everyone: we guarantee it.

Need a cozy fall dinner? Try rotisserie chicken! This recipe makes for one juicy, mouthwatering, perfectly seasoned bird! Our friends and family absolutely love this recipe, and we’re excited to share it with you. Rotisserie chicken makes the best easy meal with rice and a fall salad.

Need a healthy fall soup recipe that pleases everyone? Try this Kale Soup with White Beans! Hearty Tuscan kale, white beans and tomatoes float in a tangy broth flavored with oregano and fennel. It’s like a combination of all our favorite soup recipes in one bowl: comforting and full of bold Mediterranean-style flavors.

Once it's squash season, you've got to take the chance to make this spaghetti squash spaghetti! Instead of noodles, this fall dinner recipe uses everyone's favorite squash, which when roasted can be scraped out into "noodles". Top with marinara sauce and Parmesan cheese (or vegan Parm) and you've got an incredibly flavorful healthy fall recipe! Serve with goat cheese crumbles, meatballs, or beet salad to make it a meal.
Also try: Best Spaghetti Squash Pad Thai
To cook the squash: Roasted Spaghetti Squash or Instant Pot Spaghetti Squash
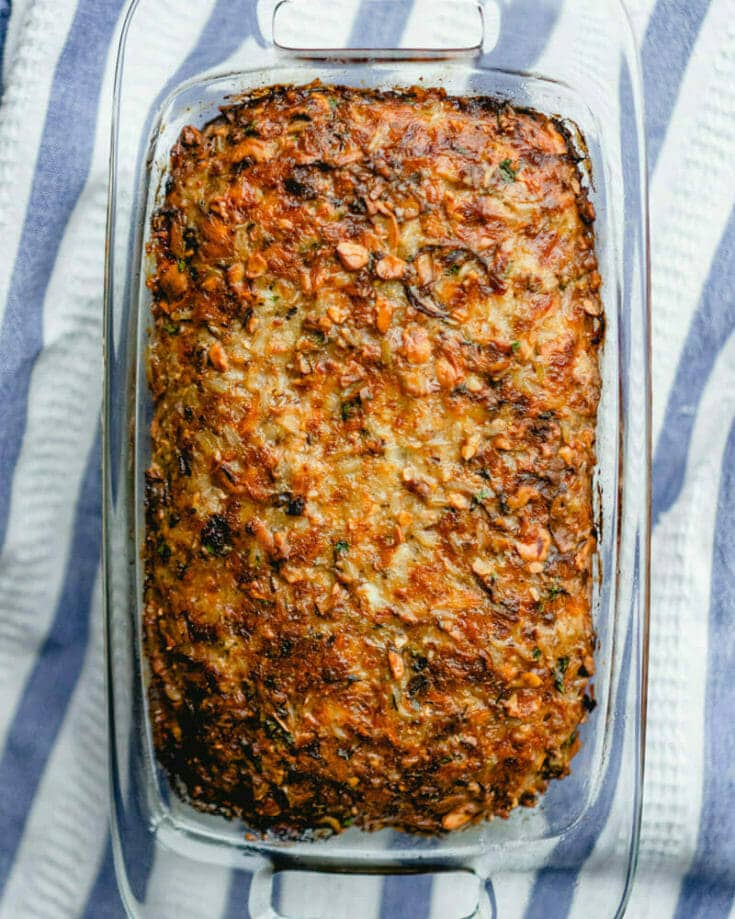
People who make this swear it has meat in it, but surprise! It's full of rice, nuts, herbs, and cheese that all together work to make the flavor and texture of meat. You've got to taste it to believe it! It's one of our most popular fall dinner recipes for good reason: it's 100% cozy. Serve with roasted Parmesan Potato Wedges or Roasted Brussels Sprouts.

Here’s a healthy fall recipe you’ll immediately add to your regular rotation…because it’s just that good. Try this White Bean Soup recipe, full of humble ingredients and huge flavor! It’s a new favorite over here, especially now that soup season has arrived. Tender white beans float in the cozy broth with soft potatoes and leafy kale. Lemon zest lends brightness and tarragon brings an herby nuance. It’s made of 100% vegetables and tastes like a dream.

It's not fall if you haven't make pumpkin pasta sauce! Pumpkin puree turns into a creamy, savory sauce when mixed with garlic, spices, and a bit of Greek yogurt. This fall dinner recipe pairs it with doughy gnocchi pillows and gooey goat cheese. It’s probably one of the coziest comfort foods we’ve baked up, and it consistently gets rave reviews! Every time we serve it, it very quickly disappears.
Also try: Pumpkin Pasta Sauce with Penne and Butternut Squash Mac and Cheese

Of course, you've got to have chili as part of your fall dinner idea repertoire! This vegetarian chili is all things cozy, starring beans, corn, bulgur wheat for a little texture, mild green chilis, and a lot of chili powder. Together with our Easy Vegan Cornbread makes for the perfect fall meal (or see any of our 10 Best Sides to Go with Chili).
Other great chilis: 3-Bean Healthy Chili Recipe or Instant Pot Vegetarian Chili

Ready for the best ever soup? This one is so delicious, you feel like you’re wrapped in a cozy hug. Did we mention it’s a totally plant based dinner recipe, too? This healthy fall recipe is ready to amaze you. Or, try the pressure cooker version: Instant Pot Lentil Soup

Here's the fall-est of the fall dinner recipes: stuffed acorn squash! The squash is roasted until tender, then draped in a toasted pecan rice stuffing that makes your kitchen smell like a fall paradise! You know that scent of onions, celery and leeks cooking in butter? Well, this recipe delivers it in spades. Everyone we’ve served it to becomes a believer…and then immediately asks for the recipe.
Got an Instant Pot? Try Instant Pot Acorn Squash

Why not add cozy mac and cheese into the hall of fame of fall dinner recipes? This mac and cheese is just as gooey as it looks. This is one of our best pasta recipes because everyone who tastes it becomes a believer. The way that the cheese melts in makes the creamiest sauce. Try it with a fancy pasta noodle to mix it up.
Also try: Pesto Mac and Cheese, Gouda Mac and Cheese, White Cheddar Mac and Cheese, or Mac and Cheese with Greek Yogurt

Another in our fall dinner ideas: ready for the coziest, most comforting soup? This curried butternut squash soup tastes like a bowl of sunshine. It’s chock full of beautiful, colorful healthy ingredients, and because it's pureed with chickpeas, it's heartier than most butternut squash soups. The Thai flavors of coconut, ginger and curry are the perfect match to this lightly sweet orange squash! Pair with grilled cheese or fancy quesadilla to make it a meal.
Also try: Instant Pot Butternut Squash Soup, Butternut Squash Lentil Soup, or Easy Pumpkin Soup!

Last up in our fall dinner recipes: these Sweet Potato Black Bean Tacos! Throw almost any seasonal veggies onto a sheet pan, season them up, and they work as a delicious taco filling! The best part: you can add the black beans right on the roasting pan. It comes out zingy and delicious: top with pico de gallo, cheese crumbles, and a dollop of sour cream. Our family couldn’t get enough!

Welcome to one of our favorite cozy fall dinner ideas: this creamy garlic chicken recipe! The tender, juicy chicken breasts are coated in garlic powder, onion powder and smoked paprika, then cooked and smothered in a garlic cream sauce!
Seasonal fall ingredients
What foods are seasonal in the autumn? Some of the seasonal fall ingredients you’ll see in recipes this time of year (click to see recipes for each):
- Butternut squash, acorn squash, and spaghetti squash
- Pumpkin
- Sweet potatoes
- Brussels sprouts
- Beets
- Cauliflower
- Apples
- Pears
For more: Head to Fall Appetizers, Fall Cocktails, Top Fall Recipes and Fall Desserts to accessorize with these meals. Or try Fall Drinks, Fall Bourbon Cocktails or Fall Vodka Cocktails.
More fall dinner recipes!
In case you’re in need of more inspiration outside of these healthy fall recipes, here are some more favorites:
- 15 Fall Soup Recipes or 12 Hearty Soup Recipes
- Farro & Brussels Sprouts Soup
- Vegetarian Meatballs
- Pumpkin Stuffed Shells
- Quinoa Stuffed Acorn Squash
- Quinoa Vegan Chili
- Roasted Vegetable Lasagna
- Golden Cauliflower Soup Recipe
- Roasted Acorn Squash with Wild Rice Stuffing


20 Fall Dinner Ideas

This butternut squash lasagna recipe is incredible! Ricotta, Pecorino, and sage make a stunning dinner that pleases everyone.
- Prep Time: 30 minutes
- Cook Time: 1 hour
- Total Time: 1 hour 30 minutes
- Yield: 9 1x
- Category: Main Dish
- Method: Baked
- Cuisine: American
- Diet: Vegetarian
Ingredients
For the butternut squash
- 2-pound butternut squash (medium)
- ½ tablespoon olive oil
- ½ teaspoon kosher salt
- ¼ teaspoon garlic powder
For the lasagna
- 9 to 12 lasagna noodles (6 to 8 ounces, gluten-free if necessary)
- 1 ½ tablespoons chopped fresh sage, divided, plus additional leaves as desired
- Zest of 1/2 lemon (about 2 teaspoons)
- ⅛ teaspoon ground nutmeg
- ½ cup plus 2 tablespoons milk
- 16 ounces (2 cups) whole milk ricotta cheese
- ¼ teaspoon kosher salt
- Fresh ground black pepper
- 1 cup shredded Pecorino cheese, divided
- 8 ounces (2 ½ cups) shredded mozzarella cheese, divided
Instructions
- Preheat: Preheat the oven to 375 degrees Fahrenheit.
- Boil the squash: Peel and cut the butternut squash into small cubes about 1/2-inch thick. (Go to How to Cut Butternut Squash for a video! A serrated vegetable peeler works best.) Bring a medium pot of water to a boil. Add the squash and cook for about 5 to 6 minutes until fork tender (test a piece to see if it is done). Drain, then place in a medium bowl. Mix with the olive oil, kosher salt and garlic powder.
- Meanwhile, boil the noodles*: Bring a large pot of well salted water to a boil. Boil the noodles until just before al dente, about 5 minutes, stirring often. Drain the noodles, then drizzle a baking sheet with a bit of olive oil. Lay the noodles flat onto the sheet, then turn them over so they become coated with olive oil to prevent sticking.
- Prepare the ricotta sauce: Add 1 tablespoon chopped sage to a medium bowl and reserve about ½ tablespoon for topping the lasagna. To the bowl, add the lemon zest, nutmeg, ricotta cheese, salt and pepper and milk. Stir.
- Layer the lasagna: In a 9” x 13” baking dish, spread ½ cup ricotta sauce on the bottom of the pan. Then top with 1 layer of noodles, ½ of the cooked squash, scant 2/3 cup cheese sauce, 1 cup mozzarella and ⅓ cup Pecorino cheese. Repeat again: 1 layer of noodles (you may need to cut a noodle in half for the side, depending on your pan), the remaining squash, scant 2/3 cup cheese sauce, 1 cup mozzarella cheese and ⅓ cup Pecorino cheese. Finally, top with noodles (again, you may need to cut a noodle in half for the top layer), then the remaining ricotta sauce spread with a spatula. Sprinkle the entire top with the remaining ½ cup mozzarella cheese, ⅓ cup Pecorino cheese, and ½ tablespoon sage.
- Bake the lasagna: Cover the pan with aluminum foil and bake for 40 minutes. Carefully remove the foil and bake another 20 minutes, until the top is browned. Let stand for 5 to 10 minutes before serving. Leftovers can be refrigerated for 2 to 3 days and reheated in a 400°F oven. (See make ahead and storage notes below.)
Notes
*If you use fresh lasagna noodles, they don’t need to be boiled.
Make ahead ideas: Boil the butternut squash in advance and refrigerate it until ready to bake. Boil the noodles in advance and refrigerate, making sure they’re coated in a little olive oil.
Or make ahead the entire pan: Make the entire lasagna prior to baking, then refrigerate overnight. Increase the bake time as needed to cook until it’s warmed through and the cheese has browned.
Storage info: Refrigerate leftovers for up to 2 days. Or freeze them: it’s easiest to cut it into single servings and freeze each in separate containers. To reheat, defrost the lasagna the refrigerator, then place in a baking dish, cover with foil and reheat at 400 degrees for about 15 minutes, until warmed through.
A few sweets
OK, we couldn’t resist adding a few fall desserts to accessorize with your meal:


