
This post may include affiliate links; see our disclosure policy.
Here’s how to cook corn on the cob: the best ways! Try these easy methods to make it boiled, grilled, oven roasted, and more.
Summer is all about corn on the cob, and there’s nothing better than sinking your teeth into that first sweet bite. Over here, we’ve mastered the art of cooking summer corn. After all, we do live in the American Midwest!
There are various method for how to cook corn on the cob, each with their own pros and cons. Browse these methods below and pick what’s right for you! The perfect grilled corn is our go-to, but we make boiled and oven roasted often as well. Below the list, we’ve got a trick for cutting corn off the cob (it’s genius!), and a few ways we like to serve it.
How long to cook corn on the cob? Boil it for 5 minutes in rapidly boiling water. Grill it shucked directly on the grates for 12 to 15 minutes at medium high heat, or wrapped in foil for 20 to 25 minutes. Keep reading for details.
How to cook corn on the cob: the best ways!

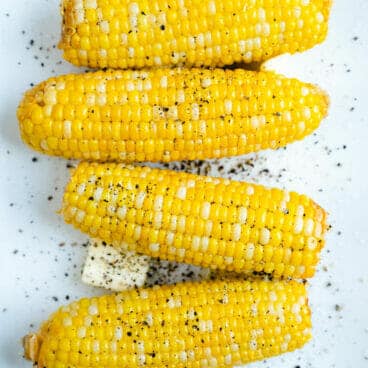
Here’s a basic skill everyone needs to know: how to boil corn on the cob! This tried and true method is the easiest way to do it. Seasoned with butter, salt, and pepper, it’s truly a classic American side dish. The best part of summer is sinking your teeth into those golden, juicy morsels!
Pros: Great juicy flavor, simple method
Cons: You have to wait for a pot of water to boil; flavor is basic
Total time: 20 minutes (including water boiling)

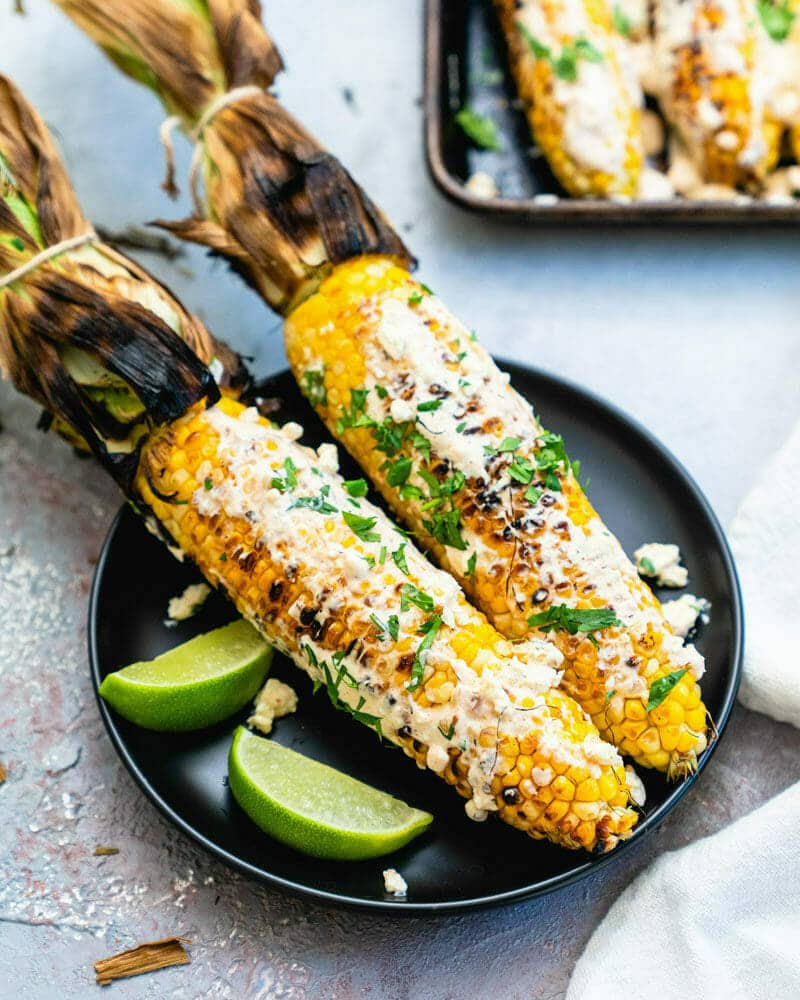
Our favorite method for how to cook corn on the cob? There’s nothing better than grilled corn! It’s smoky, tender, charred, and sweet: a crunchy blast that hits every flavor receptor in your tongue. If you’re not making grilled corn on the cob like this: you haven’t lived (yet!).
Pros: Best smoky flavor, tasty crunchy texture
Cons: Have to have a grill, cooking method is hands on and requires turning
Total time: 30 minutes (including preheat time)

Want corn on the cob and want it now? Here’s a quick way to cook it: in the microwave! It’s fast, it’s simple, and it tastes just as good as boiling.
Pros: Fastest method, makes juicy corn that's similar to boiled corn
Cons: You can only cook up to 4 cobs at once; it takes monitoring to make sure the entire cobs are cooked

Did you know one of the easiest ways to cook is corn on the cob is in the oven? This one is a game changer. There’s literally no prep time: you don’t even need to husk it! Throw it on the oven grates to roast and it comes out beautifully moist. Said one recipe tester, “This is heaven! The corn was cooked perfectly.”
Pros: Totally hands off method, flavor is delicious and moist
Cons: Longer cooking method, flavor is not as tasty as grilled, but better than boiled!
Total time: 40 minutes (including preheat time)

There aren’t many vegetables that are this perfect for cooking on a smoker. But throw on corn cobs, and the effect is brilliant. Each bite is a burst of smoky sweet, buttery and salty all at once. When you serve this to guests, we guarantee the first word out of their mouths will be “Wow.”
Pros: Flavor is incredible!
Cons: Longest cooking method, requires special equipment (a smoker)
Total time: 1 hour (including preheat time)
Ways to season corn on the cob
Once you’ve cooked your corn on the cob, it’s time for topping! There are lots of great topping ideas for corn cobs, but we like to keep it simple with these flavors:
- Butter and salt. There’s nothing better than the classic! Take it over the top with an additional sprinkle of smoked paprika and finely minced parsley.
- Mexican street corn (aka Elote). This Elote recipe is our favorite: top the corn with a creamy sauce of lime and chili powder, and crumble cheese over the top.
- Old Bay. This popular seasoning blend is perfect for corn and adds mega flavor.
- Feta, Parmesan, and chopped fresh basil. A simple topping of butter and two cheeses makes fresh corn sing.
How to cut corn off the cob
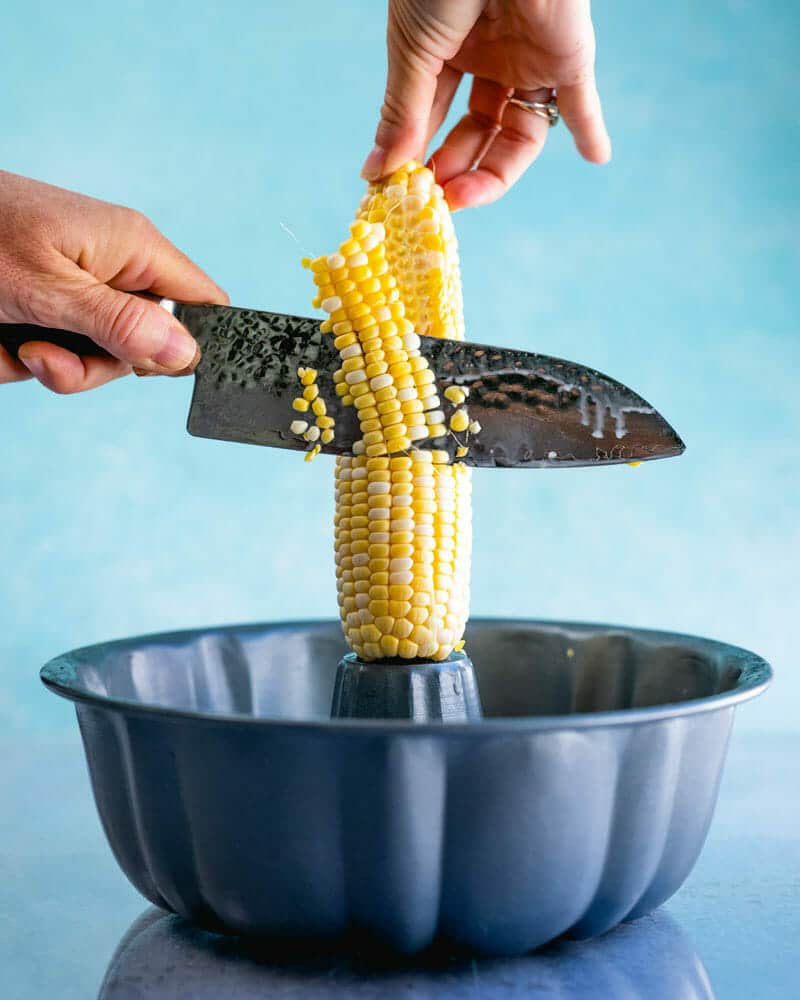
Planning to serve your corn in a salad? You’ll need to chop that corn right off the cob. But if you’ve tried it before, you know it’s extremely messy! Here’s our method for How to Cut Corn off the Cob that collects those kernels in a neat pile:
- Grab a bundt pan. Place the tip of the corn cob into the hole in the middle of the pan. Hold the bottom of the corn cob securely with your non-cutting hand. (Don’t have one? Read more here.)
- Slice downwards. Use a large chef’s knife to cut in a downward motion, letting the corn cobs kernels collect neatly into the bundt pan.
More corn on the cob recipes
Want to use your corn in creative ways? These corn recipes show the best ways to use seasonal corn on the cob in soups, salads, and more:
- Use it in soup! Try Creamy Corn Chowder or Fresh Corn Soup.
- Make a corn salad! Make a batch of Classic Corn Salad or Grilled Corn Salad.
- Add it to salsa! Try Corn Salsa or Black Bean and Corn Salsa.


How to Cook Corn on the Cob (5 Ways!)
Here’s how to cook corn on the cob: the best ways! Try these easy methods to make it boiled, grilled, oven roasted, and more.
- Prep Time: 15 minutes
- Cook Time: 15 minutes
- Total Time: 30 minutes
- Yield: 4 to 8 servings 1x
- Category: Side dish
- Method: Various
- Cuisine: Corn
- Diet: Vegetarian
Ingredients
- 4 to 8 ears corn
Instructions
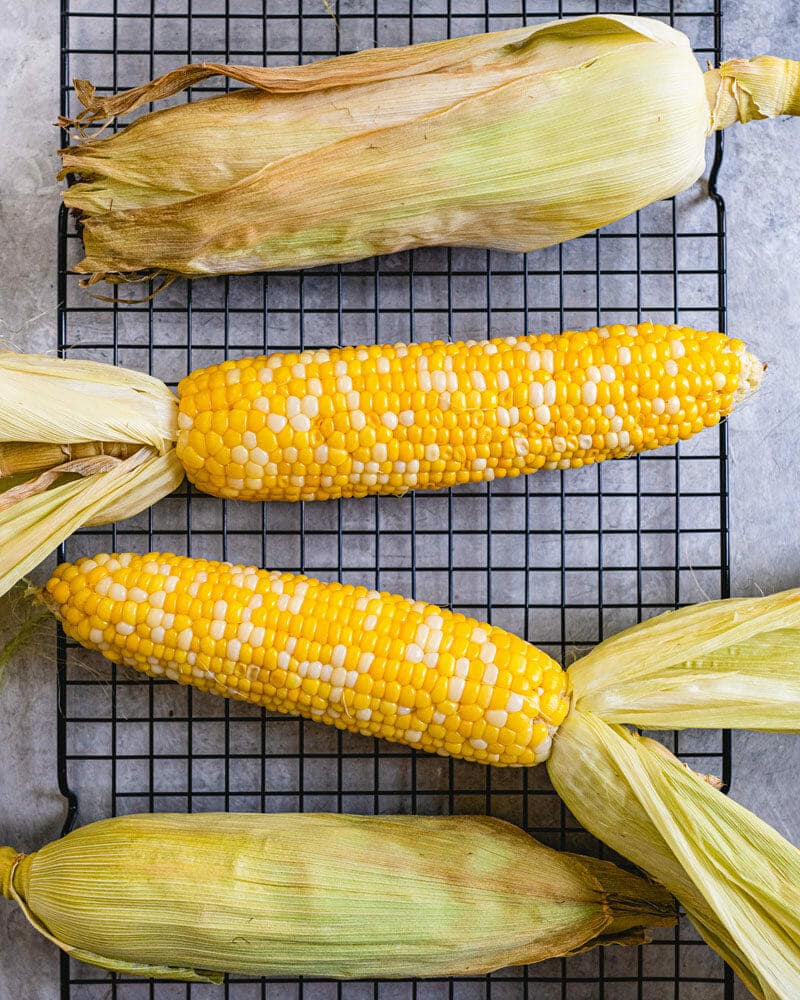
- Boiled: Place 1 tablespoon salt in a large pot of water and bring it to a boil. This takes about 15 to 20 minutes, so plan accordingly. Shuck the corn, removing the silk.
When the water is boiling, place the corn cobs in the pot. Boil covered for 5 minutes, until bright yellow and cooked through. Season with butter, salt and pepper. - Grilled: Heat a grill to medium high heat (375 to 450 degrees Fahrenheit). Shuck the corn by peeling down the outside layers one at a time and keeping them attached, facing downwards away from the cob. When you’ve finished, use kitchen twine or string to tie the leaves together (see the photos). This step is optional; it makes a natural handle for eating the corn. Otherwise, simply shuck the corn. Use your hands to rub oil on each corn cob evenly. Place the corn directly on the grill grates and cook until it begins to blacken, then turn. Cook about 12 to 15 minutes total, until blackened on all sides. Serve immediately with butter and salt, using the tied husks as a handle for easy eating.
- Grilled in foil: Preheat a grill to medium-high heat (375 to 450 degrees Fahrenheit).
Shuck the corn. Place each corn cob in a sheet of aluminum foil. Rub it with olive oil and sprinkle with salt and pepper. Top it with a few thin pats of butter (½ tablespoon in each packet). Seal foil around corn, sealing the edges at the top but not making it too tight. Poke a few small holes in each packet. Place the packets on the grill grates and grill for 20 to 25 minutes, turning occasionally, until corn is bright yellow and cooked. - Oven roasted: Preheat an oven to 350 degrees Farenheit. Using a knife or kitchen scissors, cut off the excess corn silk from each ear of corn. Remove any loose outer pieces of husk. Place ears with husks on directly onto the oven grates, spacing them out evenly. Bake for 35 minutes. Remove the corn from oven and allow it to cool slightly before peeling off the husks. Season as desired (we like butter or olive oil, kosher salt, and freshly ground pepper).


Let us know if you have any questions!